Archive for the ‘Blogging’ Category

Cookies on the Fly Part II: Continuing Service to Nowhere

March 19, 2012

So I’m still stuck in the airport.  I’ve thoroughly explored concourse D, and now I realize why I’ve never bothered to go beyond gate D9:  gates D10-D15 are boring.  Of course, that doesn’t set them apart from the rest of the concourse much.  So to ease the tedium, I’m returning to my original intentions:  cookie-blogging & cherry-eating.  Yes, I bought another bag of the bloody expensive chocolate cherries from the gift shop.  I couldn’t help it.  After I picked up the first bag that spilled, they smelled so good sitting on the seat next to me that I wanted to eat them in spite of the fact that they’d been on the floor.  So here we go again.  I’m noticing now that the packaging has a little dotted line and a picture of scissors on top.  Note to the marketers:  don’t sell something that must be opened with scissors IN AN AIRPORT.  We’re not allowed to have scissors because we might threaten to snip rude airline employees.  Okay, the bag is open.  So far, so good.  Tasting…  Wow.  Go buy these.  Second row down, middle item.  Yummy.  My fellow passenger in standby purgatory agrees.

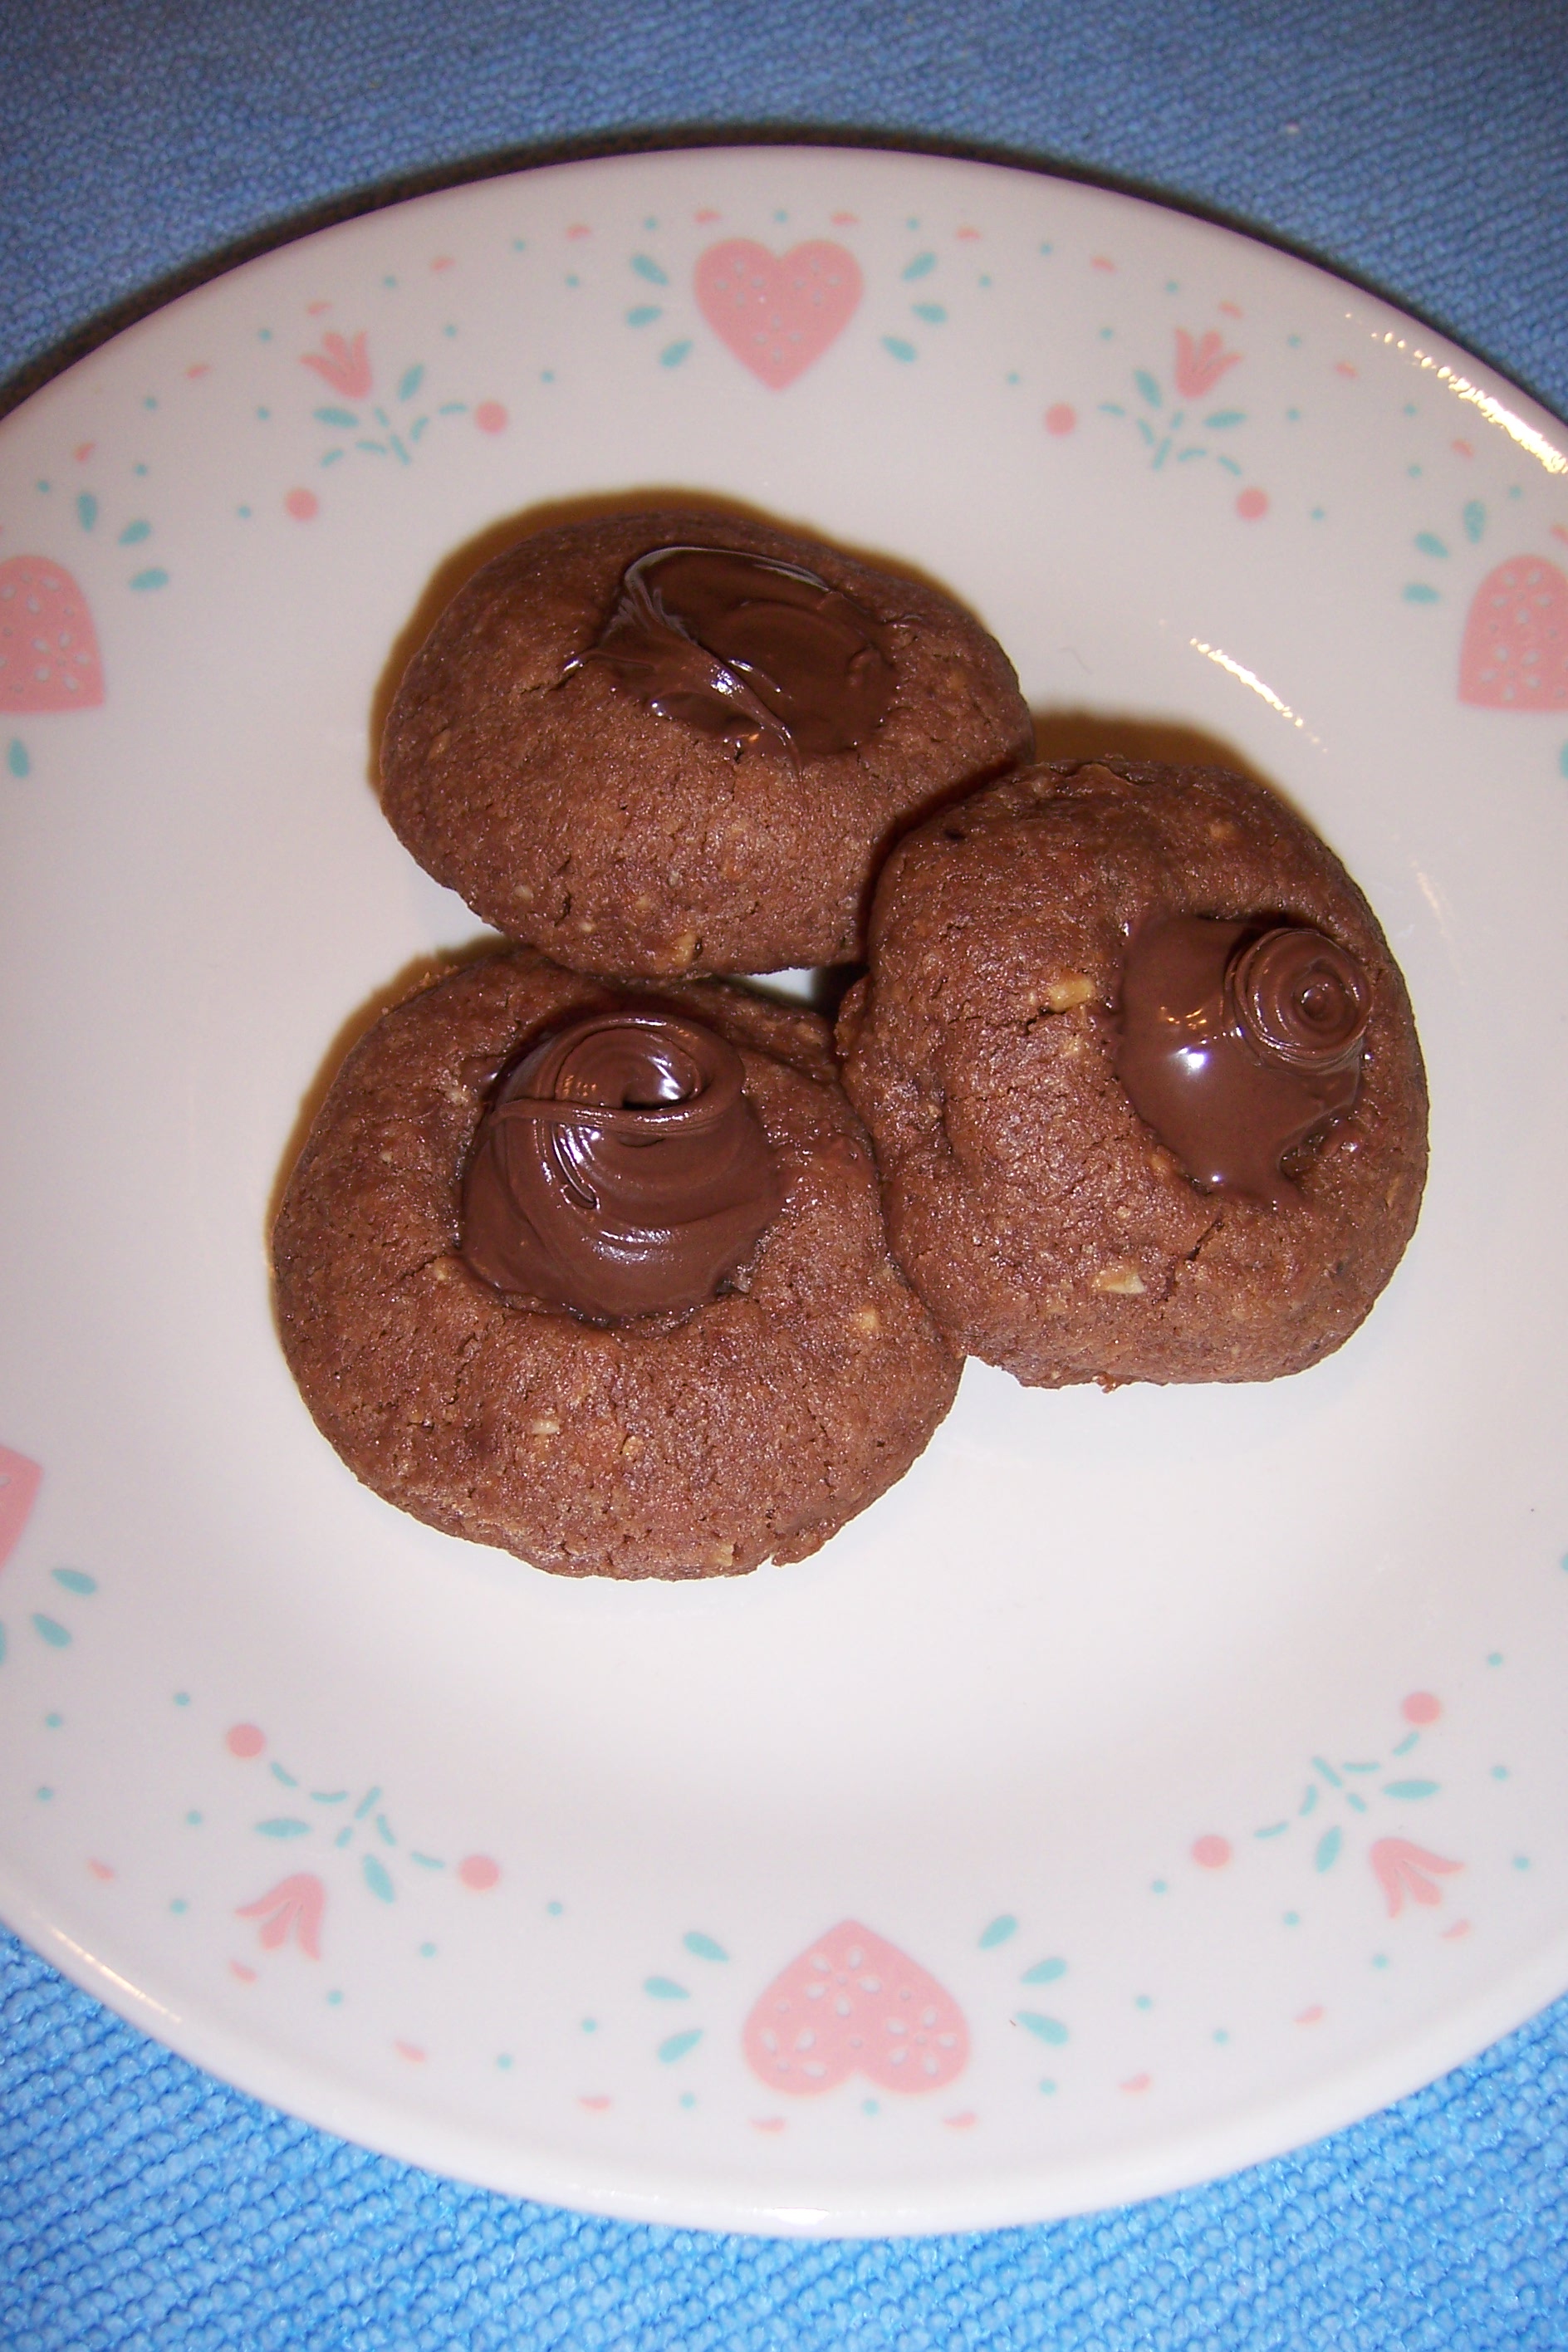
So, on to the cookies before poor Janice has an apoplexy.  This was a variation on a recipe from The Ultimate Cookie Book called Brazil Nut and Orange Cookies.  As I dislike Brazil nuts (and therefore had none on hand), I substituted macadamia nuts.  I also played with the icing a bit; I’ll address that when we get there.

Macadamia Nut and Orange Cookies

1/2 cup unsalted butter
1 1/2 cups granulated sugar
2 eggs, beaten
2 cups all-purpose flour
1 tsp baking powder
1/4 tsp salt
1 tbsp grated orange rind
1/3 cup orange juice
1/4 tsp lemon extract
1/4 cup macadamia nuts
3/4 cup finely chopped nuts  (So in other words, you need a full cup of whatever nut you use, but reserve 3/4 cup; only 1/4 goes in the cookie.)
Raisins  (Optional, and I opted against them. Seemed like a clash of flavors to me.)

Preheat oven to 350° F.

In a large bowl, cream butter with sugar.  Add eggs and mix well.  Sift together dry ingredients and add to egg mixture.  Mix in orange rind, orange juice and lemon extract.  Fold in macadamia nuts and raisins, if desired.

Drop spoonfuls of batter onto cookie sheet, 2 inches apart.  I didn’t grease the cookie sheets, and they stuck, so then I did grease them and they spread out too much and got too brown on the edges.  I’m going to say lining the sheets with parchment paper would be the better way to go.  Bake 10 to 12 minutes.  Watch them carefully.  They’ll get a bit brown on the edges before they’re quite done, and that’s fine, but they can go from light brown to over-baked quickly.

Meanwhile, prepare icing.

Icing

1 cup confectioners’ sugar
2 tbsp water
1 tsp lemon juice

I switched up the ingredients a bit.  I used orange juice instead of lemon because I had fresh oranges on hand, and since orange is a less intense flavor than lemon, I replaced half the water with orange juice as well.  It was still a faint flavor.  If I had it to do over, I would either use lemon as directed, or use all orange juice and no water.  Mix together confectioners’ sugar, water and lemon juice.  Spoon over hot cookies and sprinkle with chopped nuts; let cool.  I ran out of icing and wound up making two batches.  Even though the liquid to sugar ratio was the same, the first batch was runny; it just soaked into the cookies and disappeared.  If your icing consistency is too thin, add a bit more powdered sugar so you won’t have to ice them twice like I did.  It should ooze or stream slowly to coat the surface of the cookie, but not run or soak in like a liquid.

So there you have it.  Enjoy!  Soon to come are recipes for my very favorite muffins (despite an infamous baking powder incident), and my mother’s awesome oatmeal cookies.

Cookies on the Fly

March 18, 2012

Since I’m currently starring in my very own version of “The Terminal” (which might be tolerable if I could hang with Stanley Tucci, but is rather miserable under the circumstances), I think my time is best served by blogging cookie recipes and eating the ridiculously expensive chocolate-covered cherries I bought in the gift shop.  Wait; scratch that last part.  The cherries turned out to be encased in standard consumer packaging, and when I attempted to open the bag, it refused to rip just long enough to make me put some muscle into it, then gave way suddenly, showering chocolate-covered cherries all over the carpeting of gate D9.  Denied.  I am depressed.

So anyway, cookies.  This recipe comes from 1001 Cupcakes, Cookies & Other Tempting Treats.  The cookie is extremely rich.  You know a cookie is rich when you have to use Nutella to cut the sweetness.  I’d double.  The daubs of dough are comparatively large, and the subsequent cookies disappeared fast.

Chocolate & Hazelnut Drops

1 cup butter, softened
3/4 cup superfine sugar
1 egg yolk, lightly beaten
2 tsp vanilla extract
1 2/3 cups all-purpose flour
1/2 cup unsweetened cocoa
Pinch of salt
2/3 cup ground hazelnuts
1/3 cup semisweet chocolate chips
4 tbsp chocolate and hazelnut spread

Preheat the oven to 375° F.  Line two baking sheets with parchment paper.  Place the butter and sugar in a large bowl and beat together until light and fluffy, then beat in the egg yolk and vanilla extract.  Sift together the flour, cocoa and salt into the mixture, add the ground hazelnuts and chocolate chips, and stir until combined.

Scoop out tablespoons of the batter and shape into balls, then place them on the baking sheets, spaced well apart.  Use the dampened handle of a wooden spoon to make a hollow in the center of each cookie.  Bake in the preheated oven for 12-15 minutes.

Let cool on the baking sheets for 5-10 minutes, then transfer the cookies to wire racks to cool completely.  When cold, fill the hollows with the chocolate and hazelnut spread.

Image

Om nom nom and repeat!

Holiday Baking: Sweets for the Sweet (and my family!)

January 31, 2012

Okay, so I am way behind on my blogging.  Since I last posted, I’ve tried 5 new recipes, not to mention all the batches of old favorites I’ve cranked out (Sour Cream Cookies and Margarita Cookies were back by popular demand).  I found two of my experiments (Brown Sugar Drops from the Betty Crocker book & Buttery Fork Cookies from the 1001 book) disappointing, so I won’t waste time posting them.  However, three of my holiday dessert projects are well worth the making, so here we go!

The first recipe I want to share is one I made with my dear friend in The Kelly Kitchen just before Christmas, in between giving bottles to her darling twin boys!  She’d clipped this recipe from a magazine and bought all the ingredients, but hadn’t had the time to make it what with becoming a mom a bit quicker than expected, so when I came to visit the new arrivals, we carved out a bit of time for baking while Daddy minded the boys.  I’m not sure which periodical published this one, but it was submitted by Carol Stuber, and it was yummy:  a perfect fall treat!

Caramel Apple Bars

Crust:
1/2 cup butter or margarine
1/4 cup shortening
1 cup packed brown sugar
1 3/4 cups all-purpose flour
1 cup old-fashioned or quick-cooking oats
1 teaspoon salt
1/2 teaspoon baking soda
1/2 cup chopped pecans, optional
Filling:
4 1/2 cups coarsely chopped peeled baking apples (see my previous post for tips on good baking apples)
3 tablespoons all-purpose flour
1 package (14 ounces) caramels
3 tablespoons butter or margarine

In a mixing bowl, cream butter, shortening and brown sugar until fluffy.  Add flour, oats, salt and baking soda; mix well.  Stir in pecans if desired.  Set aside 2 cups.  Press remaining oat mixture into the bottom of an ungreased 13 x 9 x 2 inch baking pan.  For filling, toss apples with flour; spoon over the crust.  In a saucepan, melt the caramels and butter over low heat; drizzle over apples.  Top with the reserved oat mixture.  Bake at 400° for 25/30 minutes or until lightly browned.  Cool before cutting into bars.  We were impatient and didn’t follow that last bit of instruction, and they fell apart into a crumbly mess.  They were still delicious though.

Caramel Apple Bars

This next recipe is one I had done previously, but never posted.  We buy fresh oranges from H & S Citrus every winter.  It is by far the best citrus I’ve ever eaten, and with such good fruit on hand, I decided to try the recipe for Orange Drop Cookies from Betty Crocker’s Cooky Book when my sister gave it to me last Christmas.  They were delicious, so I made them again this year.  It may become a Christmas tradition, but only if I get faster at it.  Once I promised cookies to my niece and nephew, I couldn’t disappoint, but apparently it was an excruciatingly long wait, if the number of times I was asked “Are they done yet?” is any indication.

The cookies have a cake-like texture, and the refreshing orange flavor really comes through.  I recommend using fresh orange juice for both the cookie and icing.  I know it’s a bit more work, but it’s worth it, and you need real oranges to get the rind anyway, so just do it.  🙂

Orange Drop Cookies

2/3 cup shortening
3/4 cup sugar
1 egg
1/2 cup orange juice
2 tbsp. grated orange rind
2 cups flour
1/2 tsp. baking powder
1/2 tsp. soda
1/2 tsp. salt
Orange Butter Icing (recipe follows)

Heat oven to 400°.  Mix shortening, sugar and egg thoroughly.  Stir in orange juice and rind.  Stir dry ingredients together; blend in.  Drop rounded teaspoonfuls of dough about 2″ apart on an ungreased baking sheet.  Bake 8 to 10 minutes, or until delicately browned on edges.  Mine always seem to brown quicker.  Watch them closely.  Frost with Orange Butter Icing.

Orange Butter Icing

2 1/2 tbsp. soft butter
1 1/2 cups sifted confectioners’ sugar
1 1/2 tbsp. orange juice
2 tsp. grated orange rind

Blend butter and sugar together.  Stir in juice and rind until smooth.

Orange Drop Cookies

The last recipe I want to recommend is one I came across on Facebook.  It has already been blogged far more thoroughly than I could do it, so instead of reinventing the wheel, I’ll just link to it with this recommendation:  make these!  They are the perfect treat for those of you who eat so much cookie dough that you wind up baking very few cookies.  My darling nephew declared them “one of the best chocolate things I ever ate.”

And on that note, I’ll leave you to your kitchens.  I acquired three new dessert cookbooks recently (Chocolate, The New York Times Dessert Cookbook and Miette), so be on the lookout for new experiments to come!  Next on the docket is Chocolate Hazelnut Drops, from the 1001 book.  Wish me luck!

Baking Challenge: Apricot Foldovers

November 3, 2011

Well, given that my stated goal was to bake once a week, I suppose I’ve failed my baking challenge.  But in my defense, mom came home.  It’s a lot harder to bake when I’m not in control of the kitchen.  But then she left and came back again, so I managed to get one baking project in while she was gone.  My baking will likely be more sporadic now, but I’ll still post recipes from time to time, along with anything else I feel like writing about, so stay tuned.  I enjoy baking (almost as much as I enjoy eating baked goods), and I’ve discovered a lot of very good recipes while doing this, so I won’t be quitting completely any time soon.

This week’s recipe is an old favorite of mine, although I’d never actually made these myself until last weekend.  Mom has made them once or twice, and I beg her to make them again all the time, but she never does.  And now I know why.  They require an enormous amount of time and effort, so I recommend either having a free day to make them, or making your dough and filling one day, refrigerating it overnight, and baking them the next day.  Doubling the batch is also advisable since you’re going to all this trouble anyway.

The recipe is originally from mom’s old edition of the Better Homes & Gardens New Cookbook.  I don’t know what edition it is; I couldn’t find a publication date anywhere in it, but by the looks of it, it’s very old.  Whenever it was, home cooks must have had a lot more time on their hands back then, because this recipe is a doozy.  It’s worth the effort though.  These are extremely tasty.  In fact, my usually unenthusiastic mother, who answers every query as to the quality of her sensory experiences with the faint praise “Oh, it’s all right” has declared my apricot foldovers to be better than hers, so I am feeling inordinately pleased with myself.  The pastry is light and crisp, and since all the sugar is in the filling rather than the pastry, they are not overly sweet.  The flavor is very balanced and rich.  Salem ladies can also find this recipe on page 146 of the church cookbook.  Mom included it at my request.

Apricot Foldovers

1/2 cup butter or margarine
4 oz sharp cheddar cheese, grated (1 cup)
1 1/3 cups sifted all-purpose flour
2 tablespoons water
◊     ◊     ◊
1 cup dried apricots
1 cup granulated sugar
water

Cream butter and cheese until light.  Blend sifted flour into creamed mixture.  Add 2 tablespoons water and mix well.  Chill 4 to 5 hours.

Meanwhile, cook apricots according to package directions.  These are ridiculous instructions.  As far as I can see, apricot packages have no directions.  Fortunately mothers do.  Put the dried apricots in a saucepan with enough water to cover them.  Bring them to a boil and reduce the heat to simmer.  Cook them, stirring often, until they soften and fall apart, breaking them up with your spoon as they cook.  Once they’ve cooked down, drain off excess water.  Stir sugar into hot fruit; cook and stir over medium heat until mixture boils and becomes smooth; cool.  You want the filling to have a rather thick consistency.  Otherwise it will run everywhere and make a mess.  You won’t be able to work with it.

Divide chilled dough in half.  I doubled my recipe, and I ended up dividing my dough into eighths.  Smaller pieces were easier to work with.  The dough will be very stiff when it comes out of the fridge.  Squeeze and press it between your hands and against a cutting board, working it until it gets softer and more pliable.  Roll out each piece as thinly as you can without tearing the dough.  Cut in 2 1/2 inch squares or circles.  Place 1 teaspoon (you may even need to use less than that to seal them) apricot filling on each square or circle; fold over and seal.  You need to make sure you seal these very thoroughly.  Squeeze the edges together until you think there is no possible way they could separate, because they still will, and the filling will ooze out.  Bake on ungreased cookie sheet at 375 degrees for 8 to 10 minutes.

Apricot Foldovers

Enjoy!  You’ve earned it!

Baking Challenge: Crunchy-Topped Cocoa Cake

September 15, 2011

This week’s recipe is one I’ve made a few times before, so the only challenge involved was timing its preparation and baking to work around the prep and baking of a chicken pie in order to have both done early enough that my dinner guest would be able to eat before midnight.  I’m much better at baking than cooking.  Generally when I shoot to have a meal done at 6, we end up eating at 8.  Nevertheless, I did get both the chicken pie and the cake done and fed my guest in a semi-timely manner.  This recipe comes from a little book my best friend got me called Hershey’s Cocoa Easy Baking.  It’s pretty straightforward, it always turns out moist,  and between the rich chocolate cake and the caramelized topping, it is sinfully delicious, so it’s one of my standard go-to recipes when I need a great dessert to come together quickly.

Crunchy-Topped Cocoa Cake

1 1/2 cups all-purpose flour
1 cup sugar
1/4 cup cocoa powder (I once used Hershey’s Special Dark cocoa powder in this by accident, and it was a happy discovery.  It made the cake even more awesome, and I’ve used it ever since.  I highly recommend trying it with that variation.)
1 teaspoon baking soda
1/2 teaspoon salt
1 cup water
1/2 cup plus 2 tablespoons vegetable oil
1 tablespoon white vinegar
1 teaspoon vanilla extract
Broiled Topping (recipe follows)

Heat oven to 350°F.  Grease and flour an 8-inch square pan.  Stir together flour, sugar, cocoa, baking soda and salt.  Add water, oil, vinegar and vanilla; beat with a spoon or whisk just until the batter is smooth and well blended.  Pour batter into prepared pan.  Bake 35 to 40 minutes or until a wooden pick inserted in the center comes out clean.  I’ve never been a big fan of the toothpick test; it’s not the most reliable.  I judge whether a cake is done as my mother taught me.  I tap the surface of the cake lightly.  If it springs back into place, it’s done.  If it sinks a bit, it needs longer.  Meanwhile, prepare Broiled Topping; spread on warm cake.  Set oven to broil; place pan about 4 inches from heat.  Broil 3 minutes or until top is bubbly and golden brown.  Remove from oven.  Cool completely in pan on wire rack.

Broiled Topping

Combine 1/4 cup (1/2 stick) softened butter or margarine, 1/2 cup packed light brown sugar, 1/2 cup chopped nuts (pecans are good), 1/2 cup sweetened coconut flakes and 3 tablespoons light cream or evaporated milk in a small bowl until well blended.

Voila!

What are you still doing here?  Go bake this.  🙂  Bis bald!

Not-So-Challenging Baking: Drop Cookies

September 10, 2011

This has been a tired & lazy kind of week, so when it came time to bake, I wanted something quick and easy (and when it came time to blog, I procrastinated).  Easy baking generally means drop cookies.  This is the cookie group traditional chocolate chippers fall into.  Most cookie books have a section for them, or specify which ones they are.  Drop cookies are about the simplest thing you can make and still be baking from scratch.  You just mix them up and toss them on the pan; there is no rolling, cutting or filling involved.  The drop cookie du jour is a favorite of mine, though I’d never made them myself before:  macadamia nut & white chocolate cookies.  I get them from Subway all the time, and I figured it was high time I added them to my repertoire.  This recipe is a variation on the chocolate chip cookie recipe from my Better Homes and Gardens cookbook.  It turned out well, though the cookies didn’t keep for very long.  After a few days they got a bit dry & crunchy, though that may have been because I over-baked them just a bit.  They don’t really brown on top much, and if you take them out a minute or two before they’re totally done, they’ll probably have that moist, chewy texture suited to this type of cookie.

Macadamia Nut and White Chocolate Chunk Cookies

1/2 cup shortening
1/2 cup butter or margarine
1/2 cup granulated sugar
1 cup packed brown sugar
1/2 teaspoon baking soda
2 eggs
1 teaspoon vanilla
2 1/2 cups all-purpose flour
1 12-ounce package (2 cups) white chocolate chips
1 3 1/2-ounce jar macadamia nuts, chopped

Preheat oven to 375°F.  In a large mixing bowl beat the shortening and butter or margarine with an electric mixer on medium to high speed for 30 seconds.  Add the granulated sugar, brown sugar, and baking soda.  Beat mixture till combined, scraping sides of bowl occasionally.  Beat in the eggs and vanilla till combined.  Beat in as much of the flour as you can with the mixer.  Stir in remaining flour.  Stir in chocolate pieces and nuts.

Drop dough by rounded teaspoons 2 inches apart on an ungreased cookie sheet.  Bake 8 to 10 minutes or till edges are lightly browned.  Transfer cookies to a wire rack and let cool.  Let them cool on the pan for at least a few seconds before you try to transfer them, or they’ll fall apart.

When it comes to cookies, do as Subway says:  “Eat fresh!”
See you next week!

Baking Challenge: Chocolate Marzipan Cookies

August 29, 2011

Last week’s recipe comes from one of the books I appropriated from mom’s collection, aptly and creatively named Cookies.  I only bake cookies involving a rolling-pin when I have extra time and patience, and it’s been a boring week, so fortunately I had both.  Given the double rolling and cutting involved to make a top and bottom for these cookies, I was questioning somewhere in the middle of shouting at my sticky dough (which had perversely and deliberately adhered itself to the rolling-pin) whether they’d be worth it or not.  They actually were.  The marzipan punches up the mildness of the chocolate cookie nicely.  It was a good flavor complement.  Time and patience allowing, I would definitely make these again.

Chocolate Marzipan Cookies

scant 1 cup unsalted butter (I used salted; it was fine.)
generous 1 cup light brown sugar
1 egg
2 1/2 cups all-purpose flour
4 tablespoons cocoa powder
7 ounces white almond paste (I used actual marzipan, which apparently is a type of almond paste with more sugar added which makes it easier to mold, but it seems there is disagreement in the culinary world as to how each is defined.  Surprise, surprise.)
4 ounces white chocolate, chopped (Just buy chips.  Eliminate the chopping.)

Preheat the oven to 375°F.  Lightly grease two large baking sheets.  Cream the butter with the sugar in a bowl until pale and fluffy.  Add the egg and beat well.

Sift the flour and cocoa over the mixture.  Stir in, first with a wooden spoon, then with clean hands, pressing the mixture together to make a fairly soft dough.  If the dough is too sticky to roll, chill it for about 30 minutes, then try again.

Roll out about half the dough on a lightly floured surface to a thickness of about 1/4 inch.  Using a 2 inch cookie cutter, cut out rounds, re-rolling the dough as required until you have about 36 rounds.

Cut the almond paste into about 36 equal pieces.  Roll into balls, flatten slightly and place one on each round of dough.  I found 7 ounces of marzipan was more than I needed.  The balls need to be small enough that you can put the second dough round on top and still have room to seal the two together.  Leave about half an inch of clearance around the marzipan ball so you can seal the two cookies without stretching the dough too much and tearing it.  Roll out the remaining dough, cut out more rounds, then place on top of the almond paste.  Press the dough edges to seal.  Bake for 10-12 minutes until the cookies have risen well.  They don’t rise much to speak of, but the baking time is accurate.  Cool completely.  Melt the white chocolate, spoon into a paper piping bag and pipe onto the biscuits.  I couldn’t find our pastry bags, and I’ve never used paper for this.  I just spooned it into the corner of a Ziploc bag and snipped the end.  Don’t snip too much though.  You want the hole to be very small, or it’ll all just ooze out.

Chocolate Marzipan Cookies

Until next week then!

Baking Challenge: Coconut Cake

August 22, 2011

It’s two-for-one week here at The Gumball Machine.  I actually managed to bake twice.  I was motivated; I had a guest.  My uncle’s birthday is in two days, and since I won’t be with him then, we celebrated tonight.

I had a coconut cream cupcake from a “gourmet” bakery recently, and aside from tasting like coconut, it was remarkably similar to the plain white cupcakes I bake at home, only it cost more.  Since Uncle likes coconut too, I decided to play with flavoring his birthday cake to try and recreate it.  It was quite tasty, but I don’t recommend using it as a birthday cake if you’re going to have candles.  When Uncle blew them out, coconut flew everywhere!

Coconut Cake

1 white cake mix, plus what it says to add (usually oil, water & egg)
1 tsp butter extract
1 tsp coconut extract
1/2 cup sweetened shredded coconut, plus extra for top

Mix cake as directed on the package, except add coconut extract and butter extract before beating the batter.  I learned from a professional baker (via a mutual acquaintance) that when using coconut flavoring, adding an equal amount of butter extract brings out the coconut flavor better, so I took her advice.

When the batter is beaten, fold in the coconut.  Bake according to box directions, but watch your baking time.  This baked up faster than I expected.  Allow to cool completely, frost with Coconut Buttercream, and sprinkle shredded coconut on top.

Coconut Buttercream

1/3 cup butter or margarine
4 1/2 cups sifted powdered sugar
1/4 cup milk
scant 1 tsp vanilla
scant 1 tsp coconut extract
scant 1 tsp butter extract
Additional milk and/or powdered sugar if necessary

Beat butter until fluffy.  Gradually add 2 cups of the powdered sugar, beating well.  Slowly beat in the 1/4 cup milk and flavorings.  Slowly beat in remaining powdered sugar.  If icing is too thick or thin, beat in additional milk or powdered sugar to reach spreading consistency.

Coconut Cake

Happy Birthday, Uncle!

Baking Challenge: Pecan Shortbread Melts

August 18, 2011

I didn’t get around to baking last week since I was too busy simultaneously developing a sinus infection and working overtime, but I’m on the mend now, and I believe cookies will help keep me on the path to good health.  After all, a balanced diet is a cookie in each hand.  A friend of mine slaps his forehead in exasperation whenever I say that, but I still maintain it’s true.

I went rummaging on one of Mom’s cookbook shelves not long ago, and I came across two intriguing and heretofore unused cookie books:  Cookies (formerly titled The Great Big Cookie Book; not sure why they changed that) and The Ultimate Cookie Book.  I asked for, and received, permission to appropriate these books, and found dozens of recipes I want to try, starting with this one from the “Ultimate” book.

The aroma wafting out of the oven while these baked was unlike anything I’d ever smelled.  It was so rich and delectable I liked this recipe before I’d even tried one, and they did not disappoint once I had.  This is a very crumbly melt-in-your-mouth kind of cookie.  Think Keebler Pecan Sandies, only lighter, not as hard and slightly less sweet.

Pecan Shortbread Melts

1 cup unsalted butter, softened
1/3 cup confectioners’ sugar
2 tsp vanilla extract
2 cups all-purpose flour
1/4 tsp salt
3/4 cup finely chopped pecans
superfine sugar (I once again ignored this and used granulated; seemed fine [har!])

Preheat oven to 325 degrees.  Cream butter in a large bowl.  Blend in confectioners’ sugar and vanilla.  Sift flour and salt into creamed mixture.  Blend using wooden spoon.  Fold in pecans.

Shape dough into small balls the size (and shape; more like logs than balls per the picture in my book) of dates, and dredge in superfine sugar.  Arrange on ungreased cookie sheets.  You can put these pretty close together on the sheet.  They spread out slightly, but not much.  I got most of them on one large cookie sheet.

Bake 25 to 35 minutes.  Mine browned lightly on the bottom in 20-25 minutes.  If desired, broil 2 minutes or until lightly browned.  As far as I can tell, this is just for looks.  I didn’t broil most of mine, though I tried it on the last few.  There was no discernible difference in taste.  When done, transfer to wire racks and let cool.

Pecan Shortbread Melts

Uncle Paul evaluates the result of my efforts

So that’s it for this week’s challenge.  Time & health permitting, I’ve got something ambitious in mind for next week.  See you then!


Baking Challenge: Lemon Drizzle Squares

August 8, 2011

Okay, so I am baking every week.  I’m just not blogging quite as promptly.  I’ll try to work on that.  Last week’s recipe was number 174 in the “1001” book.  It was a sticky, lemony “upside down” kind of cake, and it was yummy.  But you don’t have to take my word for it.  Three of my co-workers tried these flavorful little squares yesterday, and when asked how they liked them, they all nodded blissfully with full mouths and wide eyes, making muffled but enthusiastic  “MMMmmmMMM” sorts of sounds.  And once they’d swallowed, they all asked for the recipe, so I’m going to go ahead and say this one’s a keeper.

Lemon Drizzle Squares

heaping 2/3 cup softened butter or margarine, plus extra for greasing
1 cup superfine sugar (again, granulated is just fine, no pun intended)
2 eggs
finely grated rind of 1 lemon (I cannot stress enough how much I love the microplane)
1 1/4 cups self-rising flour  (if you don’t have self-rising, sift 2 1/2 tsp. baking powder into every 1 2/3 cups all-purpose flour)
1/2 cup milk
confectioners’ sugar for dusting

Syrup

1 1/4 cups confectioners’ sugar
1/4 cup fresh lemon juice

Preheat the oven to 350 degrees.  Grease a 7 inch square cake pan and line with parchment paper.  I questioned the necessity of doing both, but I understood the reasoning once I turned out the cake.  It is extremely sticky.  The paper makes cleanup much simpler, and the greasing keeps the paper from sticking.

Place the butter, sugar and eggs in a large bowl and beat together until light and fluffy.  Stir in the lemon rind, then sift in the flour and fold into the mixture.  Stir in the milk.  Spoon the batter into the cake pan, smoothing the top.

Bake in the preheated oven for 45-50 minutes, or until golden brown and firm to the touch.  I found this baking time to be accurate.  Even if it’s already browning, don’t poke the cake halfway through to see if it’s firm like I did.  It wasn’t, and it fell and made a sinkhole in the middle.  It still tasted fine though.  Leave the pan on a wire rack.

To make the syrup, place the confectioners’ sugar and lemon juice in a small saucepan and heat gently, stirring, until the sugar dissolves.  Do not boil.  I never went over simmer on my knob; keep it low.  Prick the warm cake all over with a fork, and spoon the hot syrup evenly over the top, allowing it to be absorbed.

Let cool completely in the pan, then turn out the cake, cut into 12 pieces, and dust with sifted confectioners’ sugar.  Enjoy!

Lemon Drizzle Squares

I found a couple of new cookie books on mom’s shelves, and I’ll be trying out a delicious-sounding new recipe this week (assuming I can narrow it down to just one out of all the recipes I’ve marked), so stay tuned!